Reverb
Rooms, halls and churches with three tonal characters and a place to stand in them.
Open the studio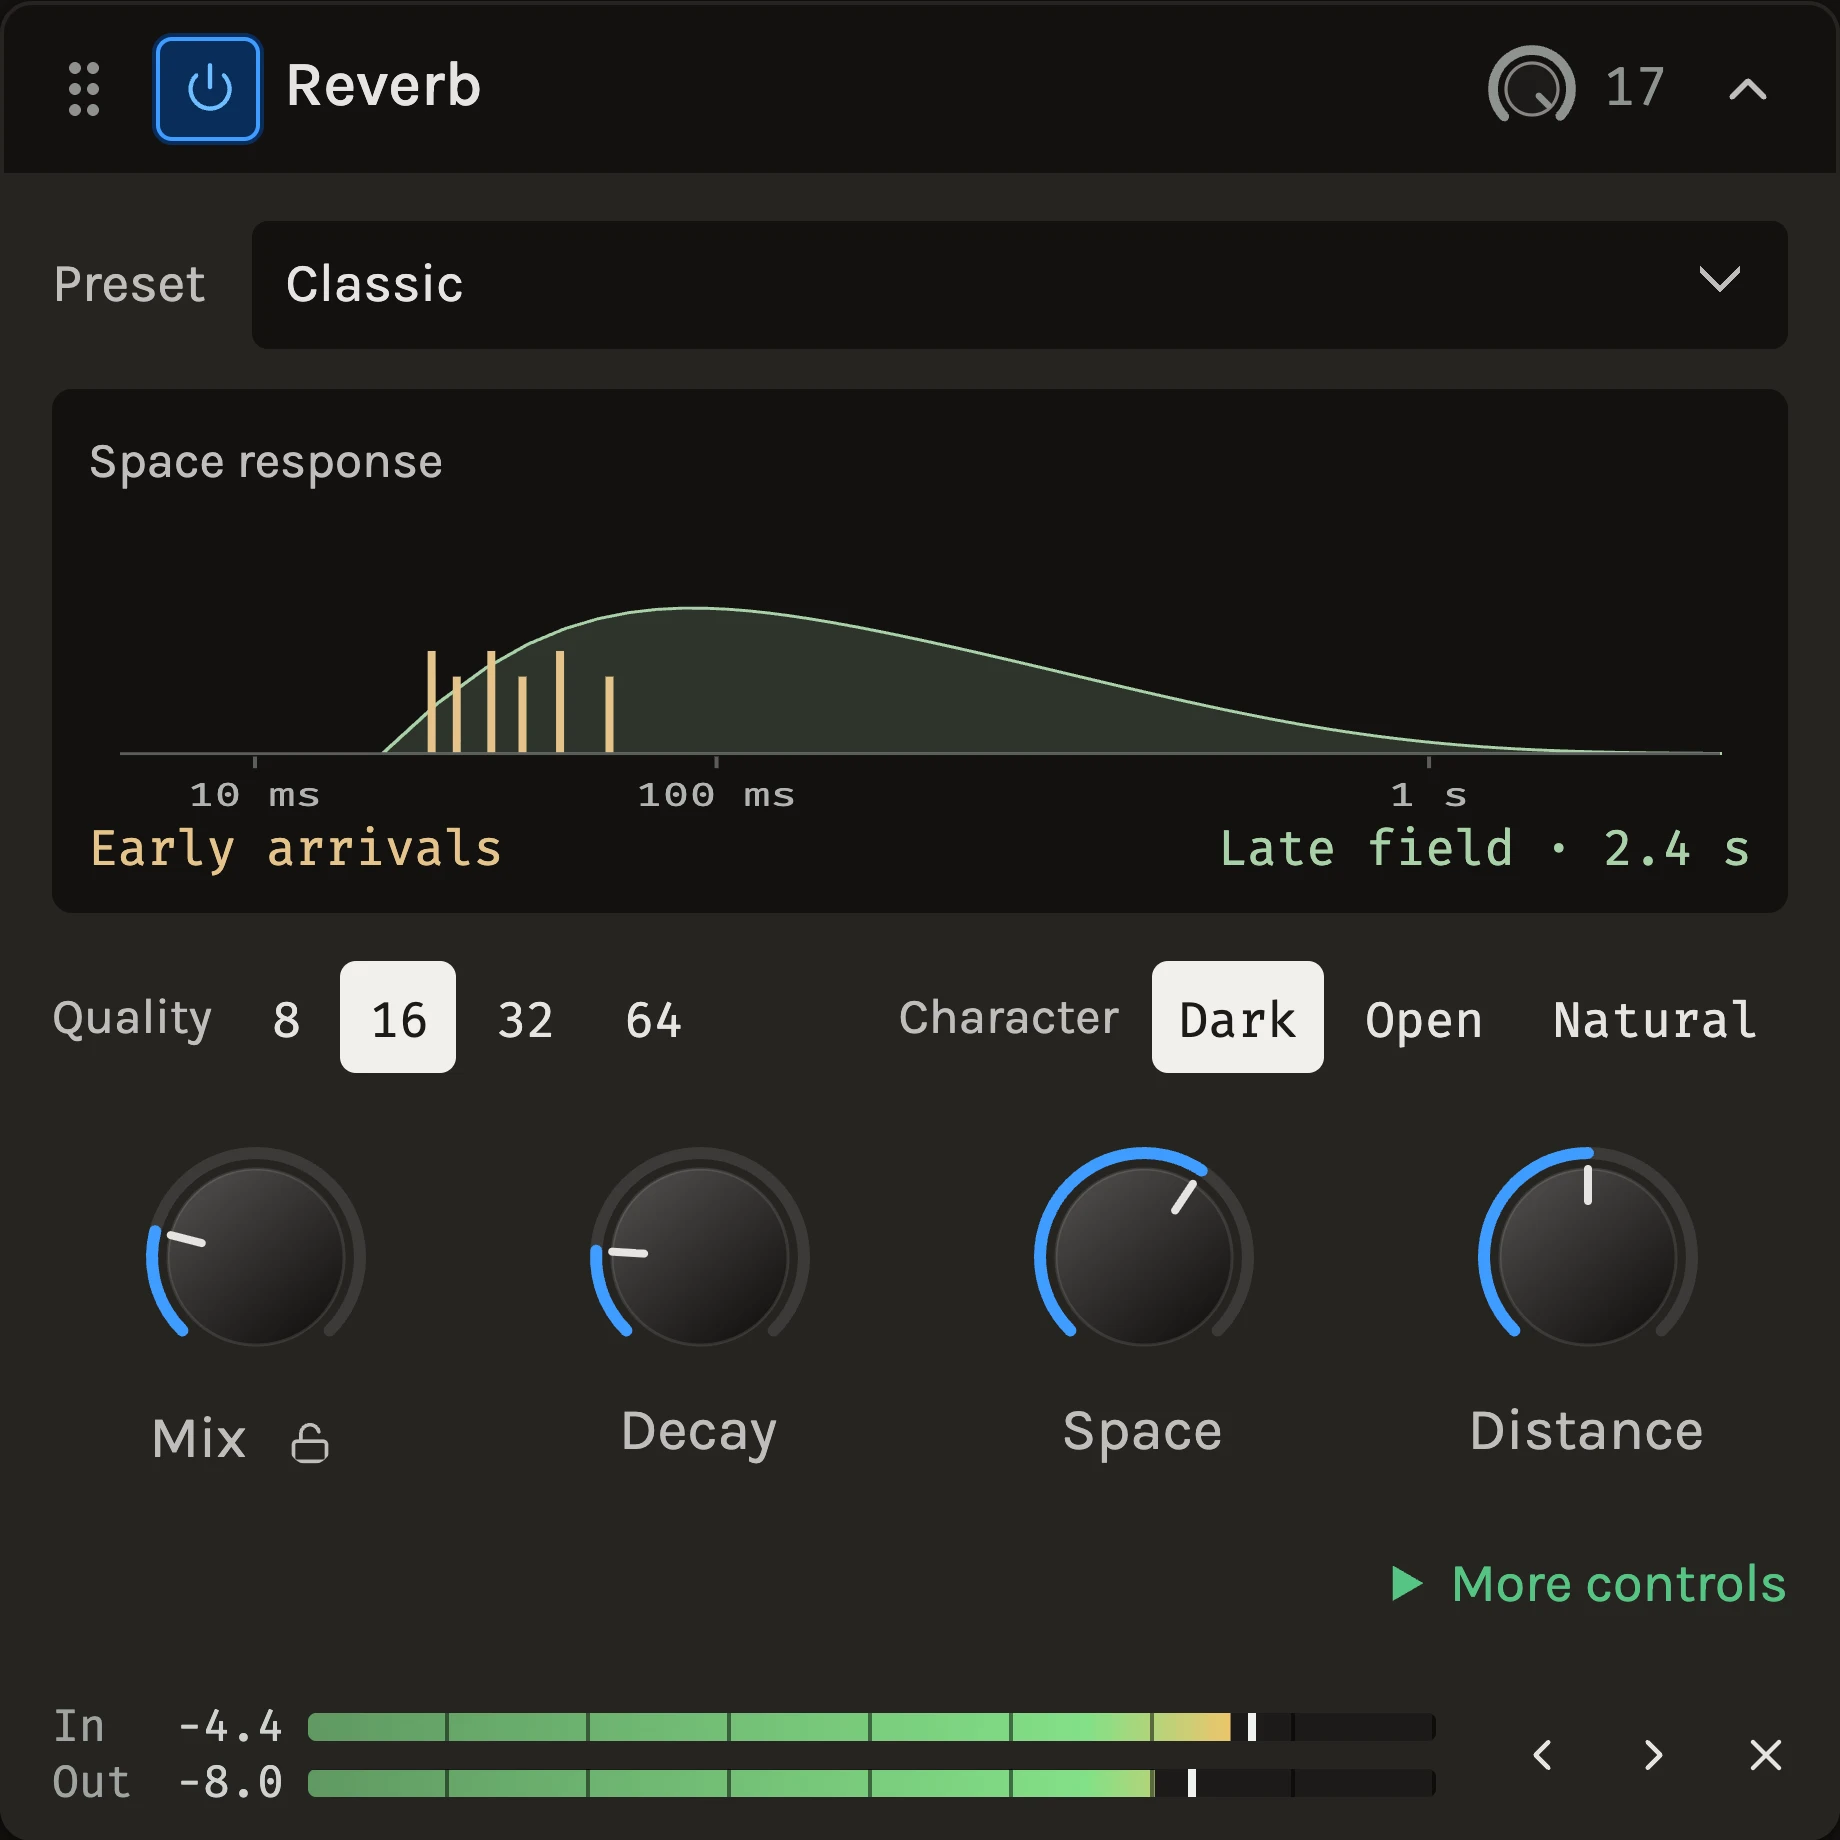
Hear the difference.
One phrase. Two characters. Switch while it plays.
About this comparison
The same Open Kalimba phrase, dry and through Reverb at 42% Mix. Both complete renders, including their tails, are RMS level-matched; switching keeps your place.
The Reverb puts a sound in a room. Early reflections give the walls, the diffuse tail gives the size and the decay, and four large knobs set the balance, the length, the room and how far away the source stands. Five templates (Classic, Room, Chamber, Hall, Church) give a starting point for each kind of room.
When to use it
Use it to give a dry instrument a place, to push a part behind another, or to let a vocal bloom on the last word of a phrase. A short Room on drums glues a kit; a long Hall on a pad becomes part of the sound. On a send return set Mix to 100% and lock it, so several tracks share one room.
For a captured real space or a cabinet, use the Convolver. For rhythmic repeats rather than a wash, use the Delay.
Controls
Character
Dark starts compact and darker, Open lets the high end linger, and Natural holds the set Decay at every length, keeps bass in the tail with its own Bass decay control and filters the wet output instead of the tail. Switching keeps your settings. Each character has its own damping control: Damping for Dark, HF decay for Open and Natural.
Mix, Decay, Space and Distance
Mix is the dry and wet balance. Decay is how long the mids take to fall away: under a second for a room, 2 to 3 for a chamber, 5 and above for halls. Space is the room size; in Natural it scales the reflections and the late onset together with the tail so the room grows rather than the source moving away. Distance moves the source in that room: close brings the reflections up, far lets the tail take over and dulls the wet sound. 50 is neutral.
Quality
The number of delay lines in the tail: 8, 16, 32 or 64. Lower counts are lighter with more character; higher counts are denser and cost more processing.
More controls
Reflections, Spacing, Reflection tone and Pre-delay shape the first wall reflections: level, spread in time, brightness and the gap after the direct sound. Tail and Late onset set the level of the diffuse field and how long after the reflections it builds, a few milliseconds for a small room and well over 100 ms for a church. Diffusion moves from a compact spread to a smoother onset; Movement adds gentle motion to the tail. Low cut keeps bass out of the wash and Stereo width collapses or spreads the wet signal.
Ducking
The header picker can feed a trigger track into the reverb. While the trigger plays the reverberant sound ducks and the dry sound stays; choose This track to let a vocal push its own reverb aside while it sings and swell back between phrases. Ducking sets how far it drops.
Tips
- Set Reflections to zero to hear only the tail while you choose Decay and Space, then bring the reflections back for the sense of walls.
- Pre-delay of 20 to 40 ms separates a vocal from its space without lowering Mix.
- Automate the send into the reverb rather than Mix when one phrase should bloom and the rest stay dry.
All control ranges 18 controls
| Control | Range |
|---|---|
| Ducking | 0 to 100% |
| HF decay | 0.2 to 1 × |
| Bass decay | 0.5 to 2 × |
| Late onset | 0 to 300 ms |
| Distance | 0 to 100% |
| Reflections | 0 to 200% |
| Tail | 0 to 200% |
| Spacing | 0 to 100% |
| Reflection tone | 1000 to 18000 Hz |
| Movement | 0 to 100% |
| Mix | 0 to 100% |
| Decay | 0.3 to 12 s |
| Pre-delay | 0 to 200 ms |
| Space | 20 to 100% |
| Diffusion | 0 to 100% |
| Low cut | 20 to 1000 Hz |
| Damping | 1000 to 18000 Hz |
| Stereo width | 0 to 100% |
Keep shaping your sound.
There’s a whole rack to explore.