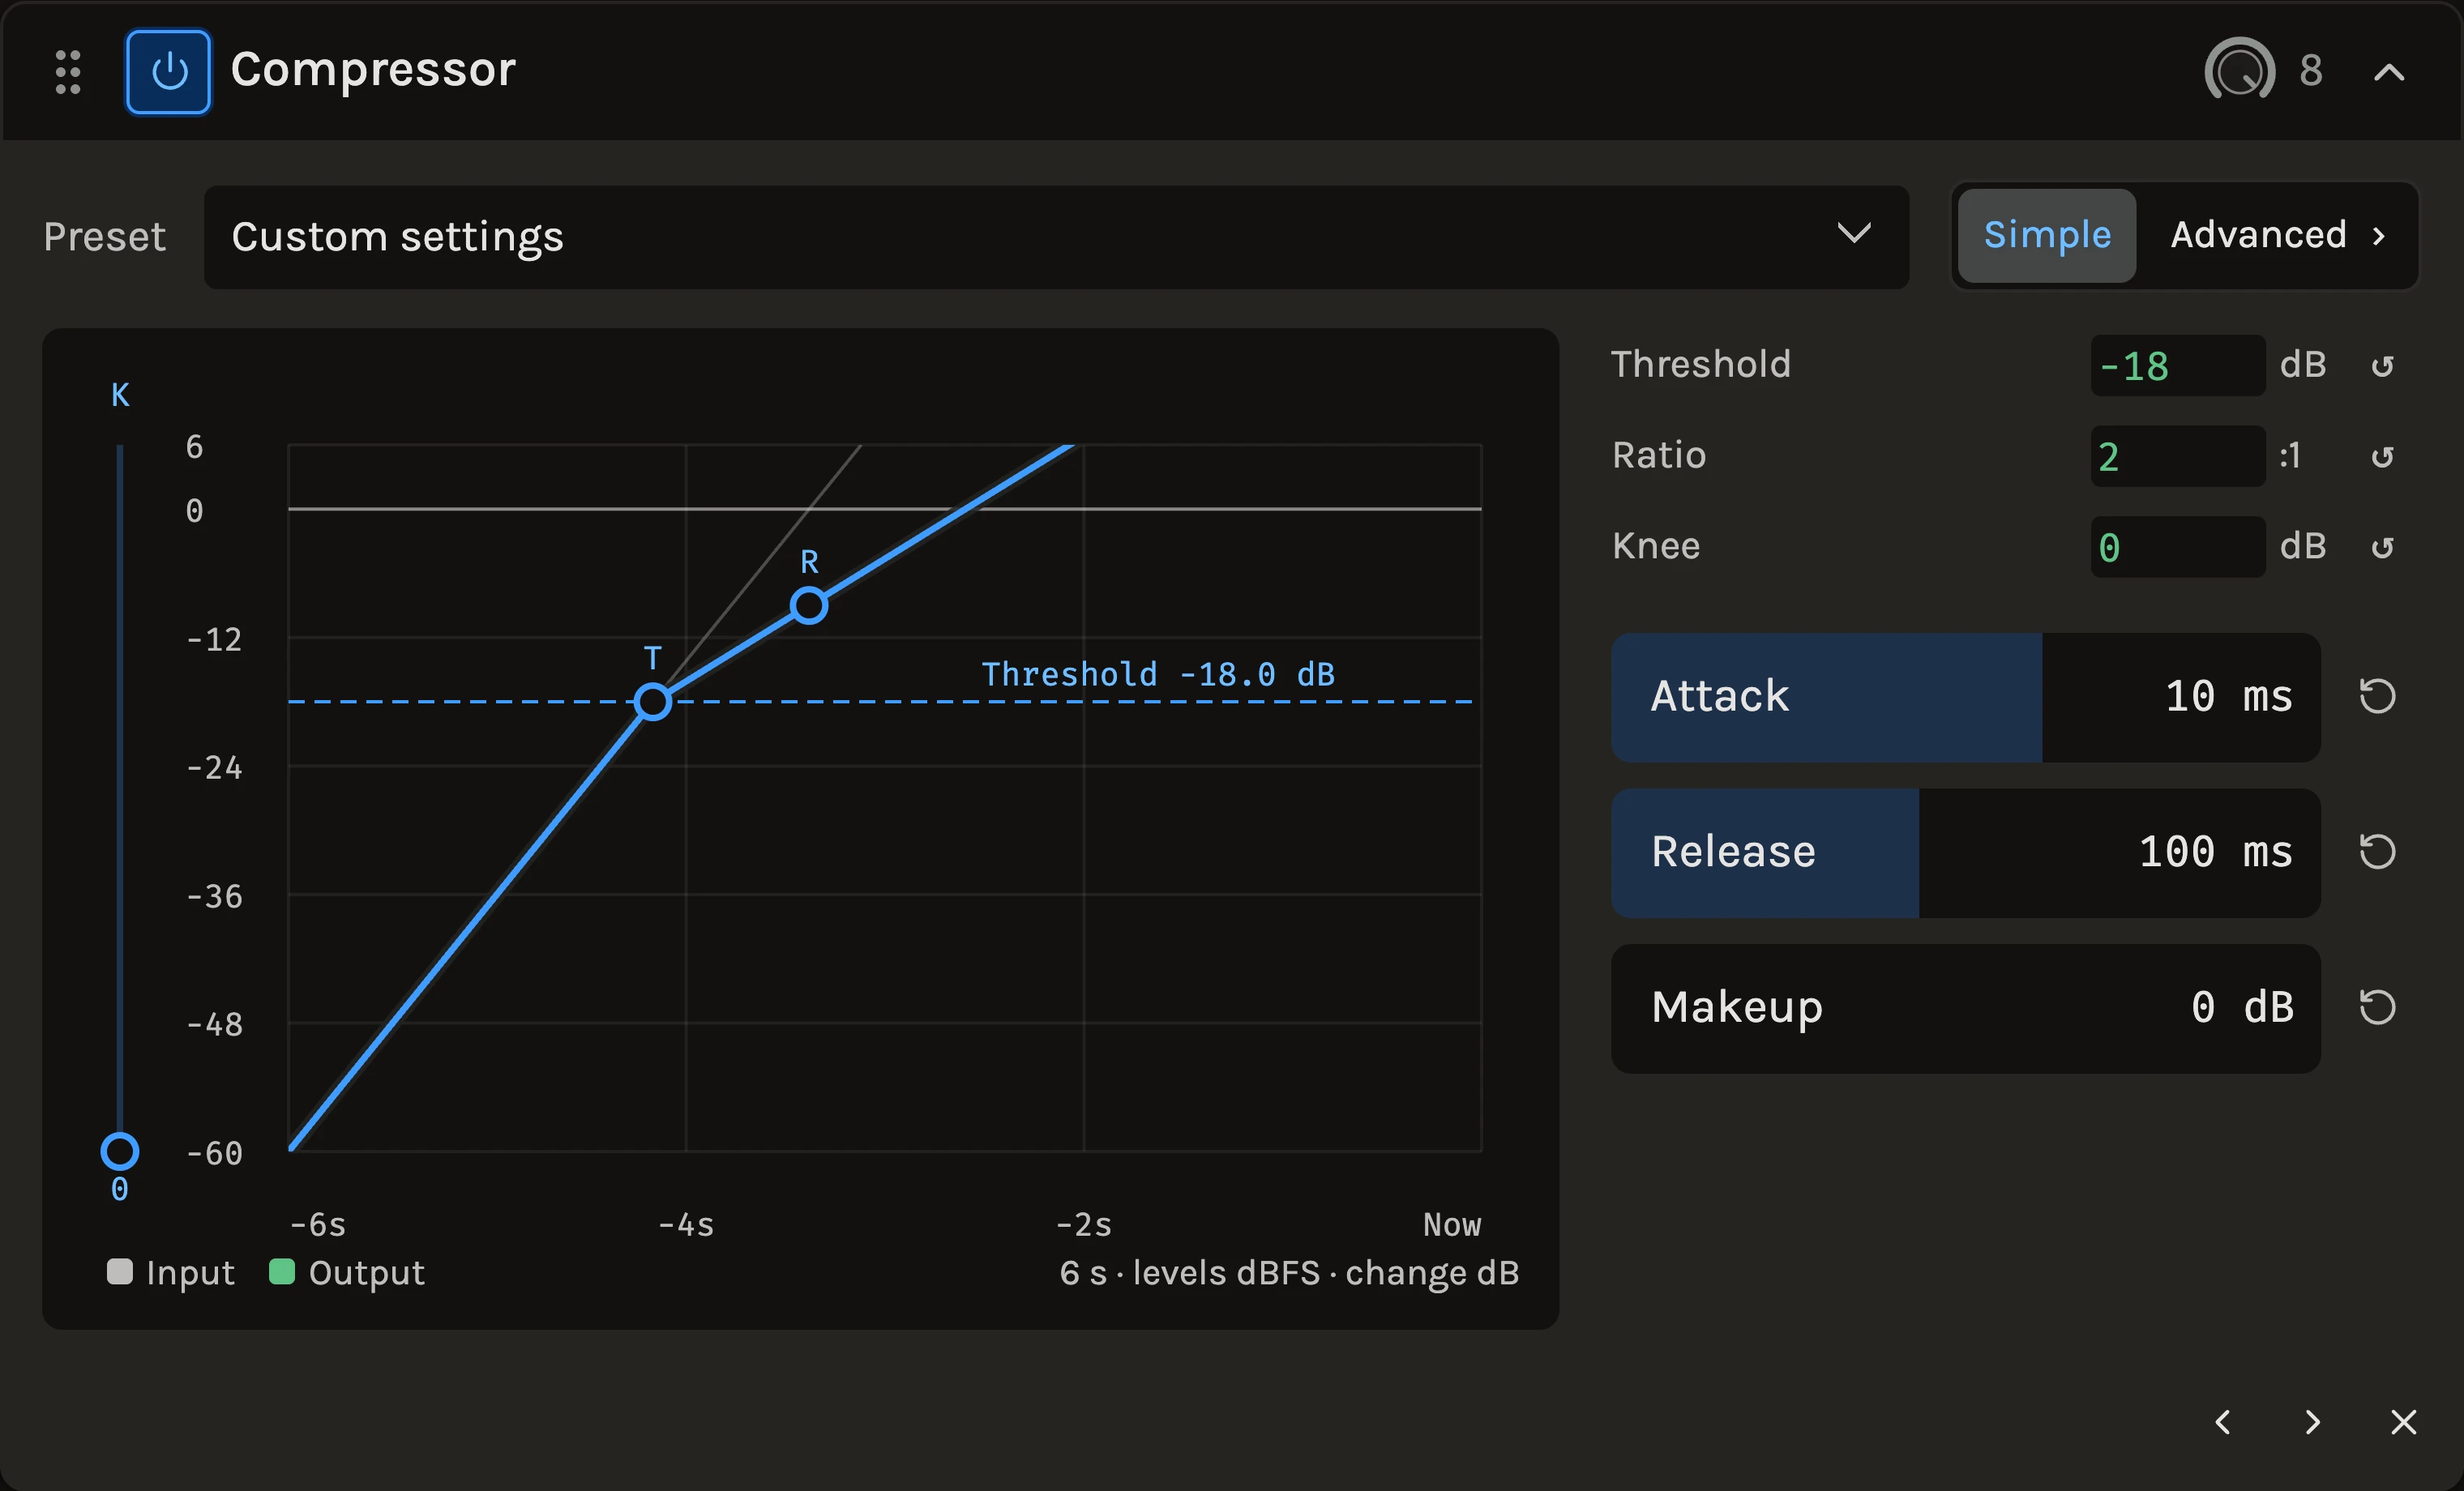
The Compressor turns loud moments down so the quiet ones can come up. Set a level where it starts working, choose how firmly it pushes, and the rest of the track sits more evenly without you riding a fader. Its display shows six seconds of what came in, what went out and how much was taken away, with the curve drawn over the top so you can see every decision you make.
When to use it
Reach for it when a vocal jumps between whispered and belted lines, when a bass guitar’s notes are not all the same weight, or when a drum bus needs the hits to feel like one kit. It also works as glue on a group: a little reduction on a mix bus makes separate parts move together.
For transparent limiting on a master use the Limiter. For speed and grit choose the FET compressor; for a heavier colour, the Stress compressor.
Controls
Threshold
The level where compression begins. Drag the handle on the curve or the knob. Start where the loud parts just cross it and watch the reduction meter: 3 to 6 dB on peaks is a safe first setting for a vocal.
Ratio
How firmly levels above the threshold are held back. 2:1 is gentle shaping, 4:1 is control you can hear, 10:1 and above approaches limiting.
Knee width
How gradually compression arrives around the threshold. A wide knee starts early and softly, which suits sustained sources; a hard knee leaves everything below the line untouched.
Attack and Release
Attack is how much of each hit gets through before the squeeze starts. Short attacks tame transients; longer ones let the hit through and compress the body behind it, which keeps drums punchy. Release is how quickly the level recovers afterwards. Match it to the music: too fast pumps, too slow flattens the next phrase. Auto under Advanced lets the release follow the material, fast after a hit and slower during sustained reduction.
Makeup
Adds level back after compression so the result can be compared at the same loudness.
Advanced
Detector EQ shapes what the compressor listens to without changing the sound: tilt it toward the low end to react to the bass, or cut the highs so cymbals do not trigger it. Peak / RMS chooses between reacting to momentary peaks and to average level; RMS is smoother on vocals and buses. Linked / Independent stereo lets the two channels share one gain or move separately. The optional Expander / Gate below the threshold quietens the gaps between phrases; its own handles live at the quiet end of the curve. Mix blends the compressed signal with the untouched one for parallel compression inside the module.
Sidechain
The header picker can feed the detector from another track. A kick on the sidechain of a bass compressor ducks the bass on every beat; the latency between the two is aligned automatically.
Tips
- Set the threshold first, then the ratio. Changing the ratio at the wrong threshold tells you little.
- Toggle the module while listening at matched level: Makeup should make bypassed and compressed sound equally loud, so you hear the shape, not the volume.
- The history display keeps scrolling while you edit and while bypassed, so you can compare settings against the same passage.
All control ranges 6 controls
| Control | Range |
|---|---|
| Threshold | -60 to 0 dB |
| Knee width | 0 to 24 dB |
| Ratio | 1 to 20:1 |
| Attack | 0.1 to 200 ms |
| Release | 10 to 2000 ms |
| Makeup | 0 to 24 dB |
Keep shaping your sound.
There’s a whole rack to explore.