Dr. Tape Sampler
Drop in WAV files, or pick a sampled instrument from the Sound library.
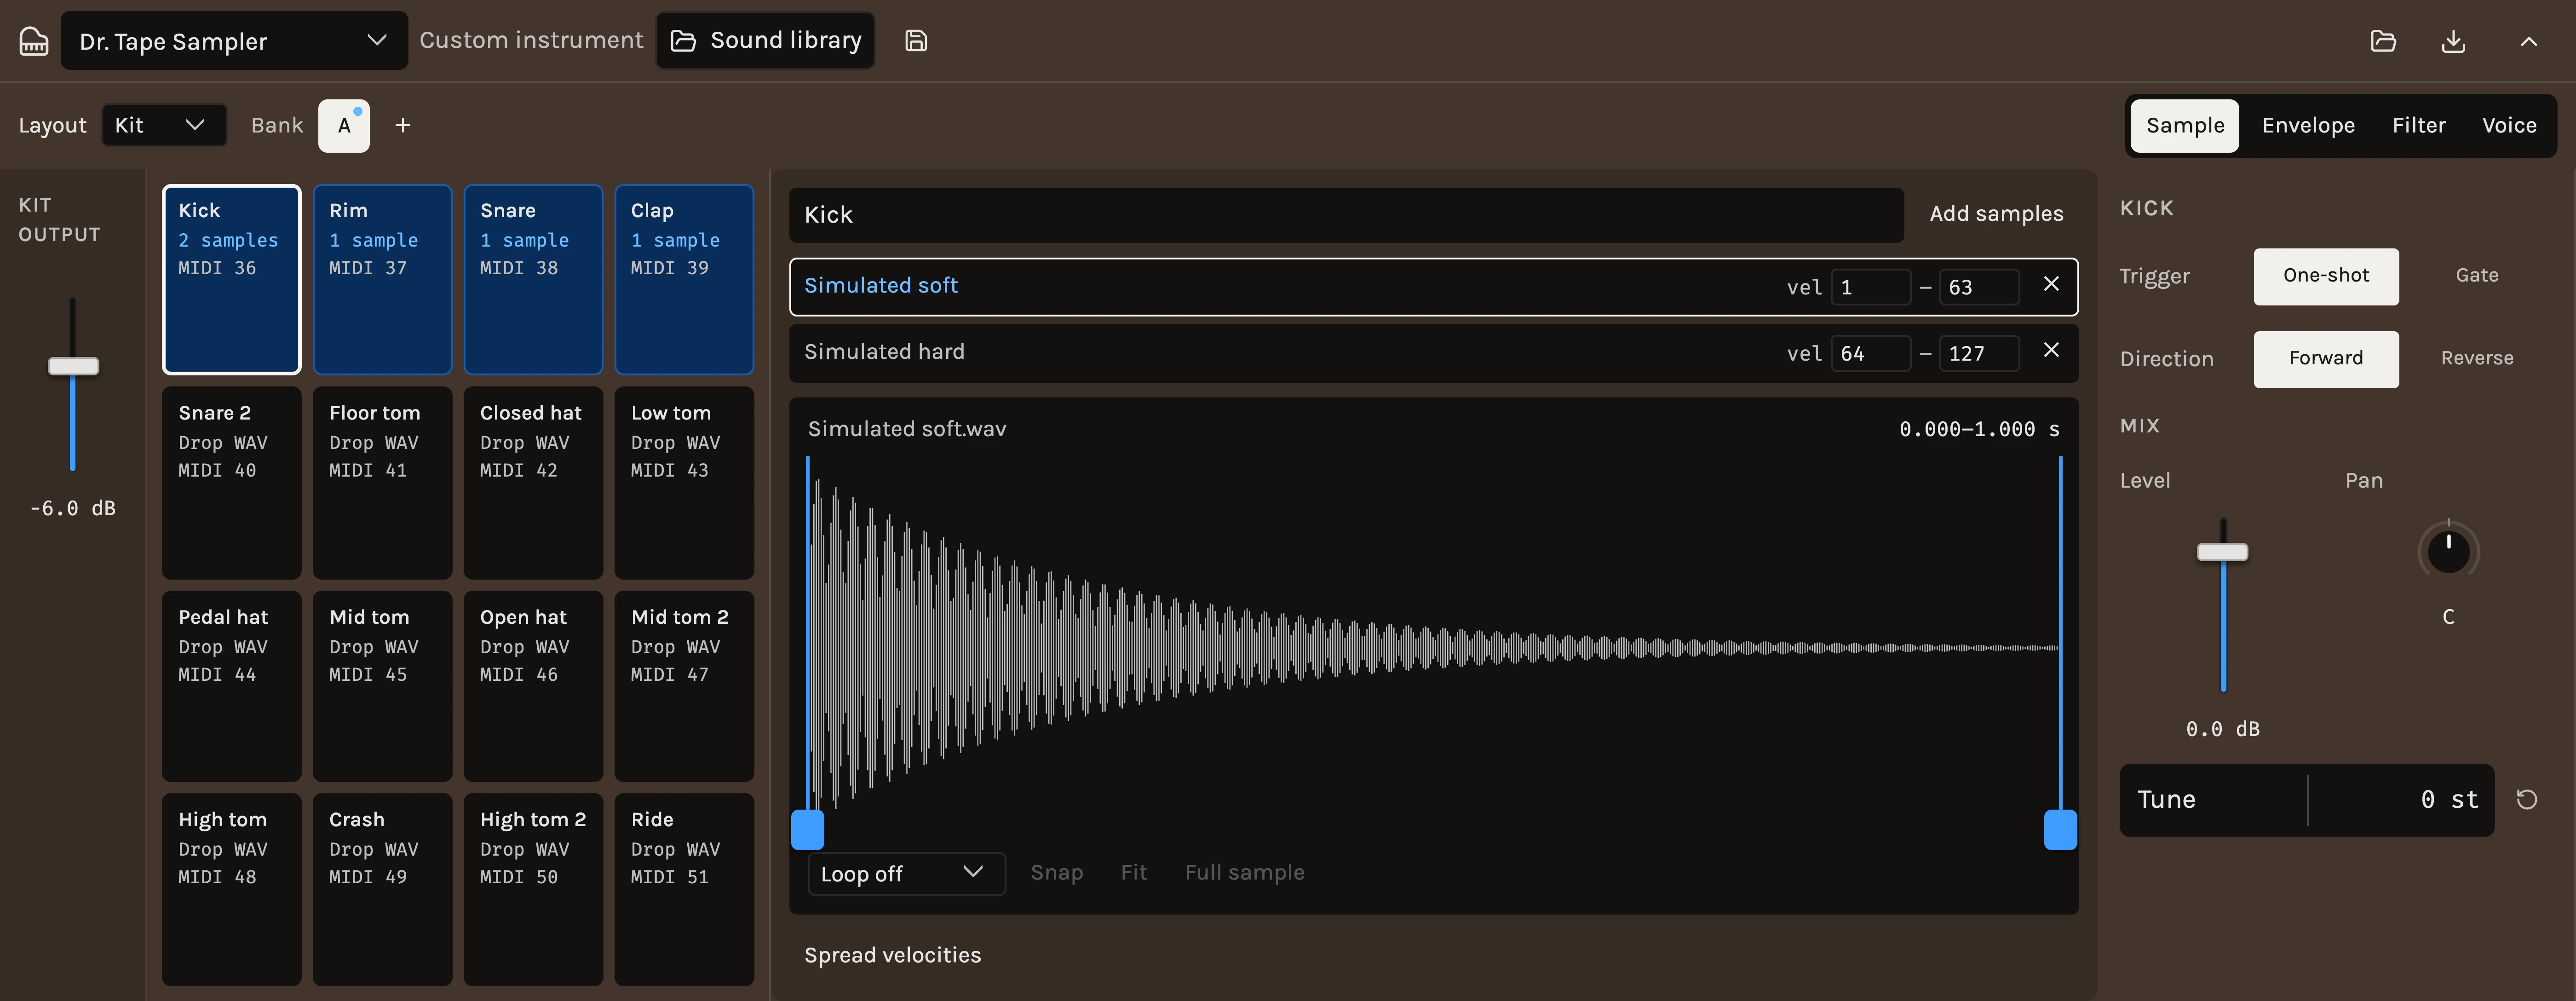
The Sampler plays recordings. In its Kit layout it is sixteen pads, each holding one or more samples with its own envelope, filter, tuning and mix, and it can grow to four banks of sixteen. In its Keys layout a Sound spreads across the keyboard: each sample gets a root note, a key range and a velocity range, and the engine transposes between them. Samples are stored inside the project file, so a saved project carries everything it plays. The Sound library fills it with complete mapped instruments from pianos to drum kits; your own WAV files go in by drag and drop.
When to use it
Use the Kit for drums and one-shots: drop a kick on a pad, a snare on the next, and group the hats so one chokes the other. Use Keys for a multisampled instrument, a single note you want to play chromatically, or a vocal chop spread over a few keys. For drums synthesized from scratch, see the Drums.
Controls
Samples and mapping
Drop WAV files onto a pad, or onto a Sound’s mapping page in Keys. Pads that hold samples are lit and empty ones stay dark, so a kit’s filled pads read at a glance. When sixteen are not enough, + beside Bank adds another bank of sixteen pads, up to D. Bank A plays MIDI 36–51, B 52–67, C 68–83 and D 84–99, with General MIDI names where they exist. The letters switch banks and a dot marks a bank that holds samples; − removes the last bank while its pads are empty. While you drag a clip from the sequencer, rest it on a bank’s letter to open that bank. In the Beats editor the pads past bank A join the rows once they hold a sample or the clip plays them. Select a sample row and drag its Low, Root and High handles above the keyboard; the labels show note names. Root is the recording’s own pitch. Samples that share a key range but have different velocity ranges become layers; samples sharing the same velocity range take turns, Cycle or Random, under Layers. In Keys the map above the waveform draws every sample of the Sound as a block, keys left to right and velocity bottom to top. Drag a block’s side to change its keys, its top or bottom to change its velocities, or its middle to move it, Root and all. Where two blocks meet, the shared edge moves both, so layers never overlap or leave a gap; hold Option or Alt to move one edge alone. Samples that share their keys are velocity layers, and Spread velocities gives them equal ranges, quietest first in list order; a Kit pad has the same button for its samples. Below the rows, the waveform shows the selected sample with Start and End handles for trimming without touching the file; Full sample restores both. Hold the pointer on the waveform to hear that sample; the notes sounding from it show as lines moving over the picture.
From the song
Drag an audio clip out of the sequencer onto a pad, a key of the Keys map, or this track’s head, or choose Send to sampler in the clip’s menu. The clip is captured as it sounds, with its trims, loop repeats, gain, fades and chosen takes, and without the track’s effects unless the menu’s With the track’s effects is ticked. On a pad it becomes the pad’s sample; a pad that already has samples asks whether to replace them or add a layer. On a key it becomes a zone on that key, or the whole keyboard when the Sound is empty. On a block in the Keys map it asks the pad’s question too. Replace swaps that sample, and Add layer stacks the clip on the same keys, ready for Spread velocities. Anywhere else on a Sound’s mapping page it goes on the key above the highest root, or across the whole keyboard from C4 when the Sound is empty, whichever Sound is showing. Several selected clips land on the pads in a row, or on the keys chromatically upward; Spread keys then widens each zone to meet its neighbours halfway; samples on the same root are layers of one note and share its range. A drop on the track’s head takes the first empty pad, or in Keys the key above the highest root.
This is also how to record samples. Arm an audio track and record while the song plays, cut the take into one clip per hit or phrase with the cutter, select them all and send them: they land on the pads in a row, or up the keys.
Loops
A loop keeps a note going for as long as you hold it. Choose Sustain, Continuous or Ping-pong under the waveform and two more handles appear on its upper edge for Loop start and Loop end. Sustain loops while the key is down, then plays the rest of the sample on release, which suits strings, pads and anything with a natural ending. Continuous keeps looping through the release. Ping-pong plays up to the loop, then runs it forwards and backwards in turn. A loop needs the sound to follow the note, so switching one on sets Trigger to Gate. Set it back to One-shot and the loop is drawn faint with a note beside the loop choice; One-shot plays straight through it.
The third handle, beside the loop end, is the crossfade. Drag it into the loop to blend the audio before the loop start into its last part, which removes the click at the join without changing the loop length. Start with a few milliseconds and lengthen it until the join disappears; a long crossfade on a changing sound can add a soft beating. Snap, off until you turn it on, settles a handle you let go on the nearest point within a few pixels where the waveform crosses zero, another way to avoid clicks. To place loop points precisely, zoom with ⌘ or Ctrl and the wheel, or a pinch, and press Fit to see the whole sample again. A file that already carries loop points starts looped.
Playback
Trigger: One-shot plays to the end whatever the note length; Gate follows the note and releases on note-off, and is the default in Keys. Direction plays Forward or Reverse. Attack, Decay, Sustain and Release shape the level; Release also applies after a choke. Pitch envelope starts the pitch away from the tuning by up to two octaves and Pitch decay sets how fast it settles, which gives a kick its drop.
Filter
Filter is Off, Low, High or Band, with Cutoff and Resonance. Envelope lets the amplitude envelope move the cutoff in octaves, and the filter’s Velocity opens it further on hard hits.
Velocity and voices
The second Velocity sets how much a hit’s strength changes its level; zero plays every hit at full level. Curve is Soft, Linear or Hard. Choke group: pads sharing a group above zero cut each other off, like closed and open hats. Voices is how many hits of one pad may sound at once; 1 makes a retrigger cut the previous hit.
Mix
Tune in semitones, Level and Pan per sound, and Output for the whole kit.
Tips
- Library instruments keep their own mapping, loops and pedal behaviour, and their drum kits show named pads; the detailed editor underneath is still there when you want to adjust a sound.
- Dropping samples never stops the song: the import is prepared while playback continues and lands as one undo step.
- Trim a long sample’s Start rather than its Attack when the hit arrives late; the envelope stays snappy and the file is unchanged.
Control ranges
Kick
| Control | Range | What it does |
|---|---|---|
| Trigger | One-shot · Gate | One-shot plays to the end of the sample whatever the note length. Gate follows the note and releases on note-off. |
| Direction | Forward · Reverse | |
| Start | 0 to 1, starts at 0 | Where playback begins, as a fraction of the sample. |
| End | 0 to 1, starts at 1 | Where playback stops, as a fraction of the sample. |
| Attack | 0.001 to 5 s, starts at 0.001 s | |
| Decay | 0.005 to 20 s, starts at 5 s | |
| Sustain | 0 to 1, starts at 1 | |
| Release | 0.002 to 10 s, starts at 0.05 s | Fade after note-off for Gate pads, and after a choke. |
| Pitch envelope | -24 to 24 st, starts at 0 st | Semitones the pitch starts away from the tuning before settling. |
| Pitch decay | 0.005 to 2 s, starts at 0.08 s | |
| Filter | Off · Low · High · Band | |
| Cutoff | 30 to 20000 Hz, starts at 20000 Hz | |
| Resonance | 0.5 to 8 Q, starts at 0.7 Q | |
| Envelope | -5 to 7 oct, starts at 0 oct | The amplitude envelope moves the cutoff by this many octaves. |
| Velocity | 0 to 1, starts at 1 | How much note velocity changes the level. Zero plays every hit at full level. |
| Curve | Soft · Linear · Hard | Soft keeps quiet hits louder; Hard needs a firm hit for full level. |
| Choke group | 0 to 8, starts at 0 | Pads sharing a group above zero cut each other off, like closed and open hats. |
| Voices | 1 to 16, starts at 8 | Hits of this pad sounding at once. One makes a retrigger cut the previous hit. |
| Layers | Cycle · Random | How samples sharing a velocity range take turns. |
| Tune | -24 to 24 st, starts at 0 st | |
| Level | -60 to 12 dB, starts at 0 dB | |
| Pan | -1 to 1, starts at 0 |
Kit
| Control | Range | What it does |
|---|---|---|
| Output | -36 to 12 dB, starts at -6 dB |
1 factory presets.
See also
Changes
- ImprovedShape the Sampler's Keys map by hand, and layer by velocity · 9 October 2026
The blocks in the Sampler's Keys map can now be dragged. A side changes the keys, the top or bottom the velocities, the middle moves the whole sample. Edges where two layers meet move together unless you hold Option or Alt. Spread velocities now works in Keys for samples that share their keys, and a clip dropped on a block asks whether to replace that sample or add a layer on the same keys. Spread keys now keeps layers that share a root together on one range; before, it refused a Sound with velocity layers.
- NewUp to four banks of pads in the Sampler · 9 October 2026
A Sampler kit is no longer limited to sixteen pads. + beside Bank adds another sixteen, up to four banks on MIDI 36–99, and the letters switch between them with a dot on each bank that holds samples. Resting a dragged clip on a bank's letter opens it, and pads that hold samples are lit.
- NewLoop your own samples in the Sampler · 8 October 2026
A sample can now loop while you hold the note. Choose Sustain, Continuous or Ping-pong under the waveform, drag the loop handles on its upper edge, and pull the crossfade handle into the loop to take the click out of the join. Snap settles a released handle on a nearby zero crossing, the waveform zooms with ⌘ or Ctrl and the wheel, and a WAV that already carries loop points starts looped. A loop needs the note to be held, so switching one on sets Trigger to Gate and says so; set a sound back to One-shot and its loop is drawn faint with a note, since One-shot plays straight through.